Installing DD-WRT on TP-Link TL-WDR3600 N600
DD-WRT is a third-party firmware project that is designed to replace the original firmware for commercial wireless routers and wireless access points. It is a Linux-based firmware and is a solid alternative to the original firmware in your router.
Why would I do this?
The TP-Link TL-WDR3600 N600 is a pretty good budget Gigabit router for homes. I’ve been using it for a few years now and I like almost everything about this except the fact that there’s no inherent VPN or QoS functionality. Not a deal breaker, but it would be great to extend the capabilities of the device for no additonal cost. There’s also the fact that I’m a networking enthusiast and this is a good opportunity to learn.
What you need:
- A TP-Link TL-WDR3600 N600 router.
- You could use any other DD-WRT supported routers as well. Check out the DD-WRT website to see if your router is supported.
- A PC connected to your router with an ethernet cable (duh).
Step 1:
Head to the DD-WRT website and search for your router. Mine is TP-Link TL-WDR3600, hence I pick that one from the search results.
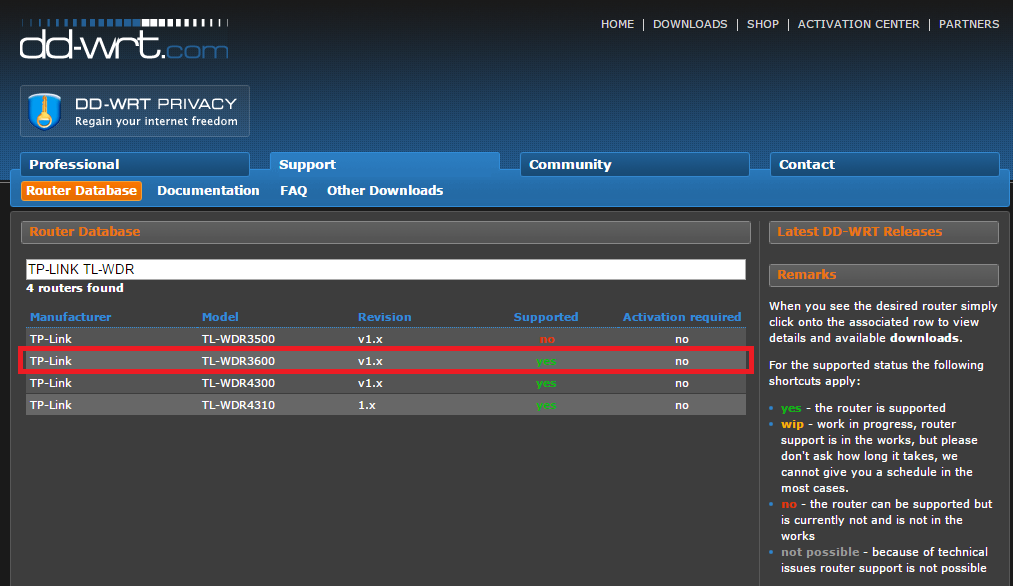
If your router is supported by DD-WRT, you will see a bunch of firmwares which you can download.
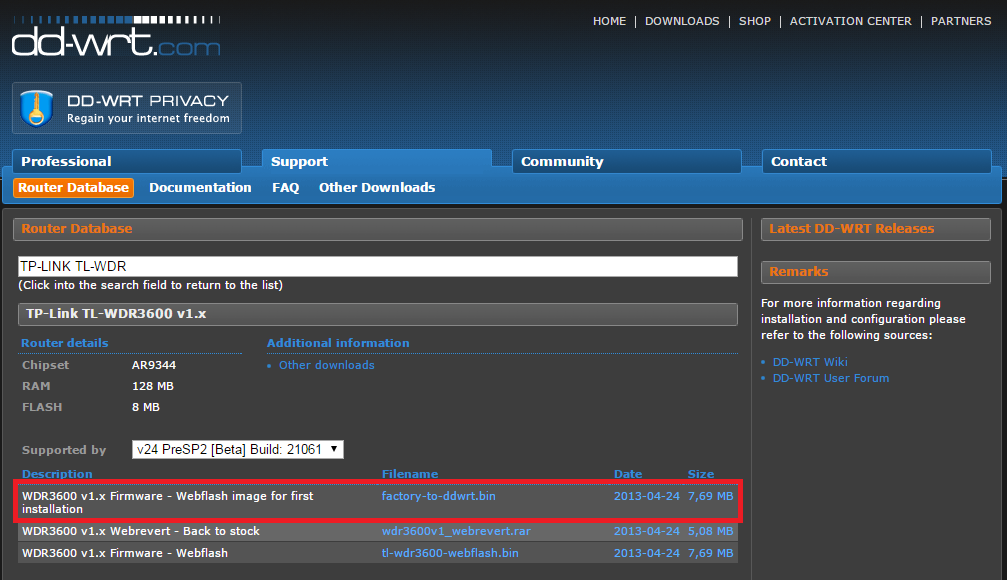
In this case, we see 3 firmwares.
factory-to-ddwrt.bin- Use this if you're flashing from stock firmware to DD-WRT firmware. This is what we will be doing.
wdr3600v1_webrevert.rar- Use this if you already have DD-WRT installed and you want to go back to stock firmware.
tl-wdr3600-webflash.bin- Use this if you currently have DD-WRT installed and you want to upgrade to a newer version of DD-WRT.
Step 2:
Once the factory-to-ddwrt.bin file is downloaded, head to your router’s web interface and log in.
Open up your browser and type your router’s IP address. By default, it should be 192.168.1.1 or 192.168.0.1. If your network uses a different private IP range, then enter the appropriate router address.
[video width=”842” height=”444” webm=”https://wiseindy.com/wp-content/uploads/2015/07/installing-dd-wrt-on-tp-link-tl-wdr3600-n600-05.webm” loop=”true” autoplay=”true” preload=”auto”][/video]
Step 3:
From the left sidebar, navigate to System Tools > Firmware Upgrade
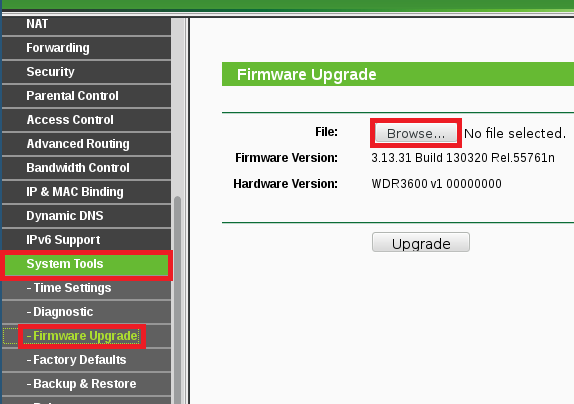
Select Browse… and pick the factory-to-ddwrt.bin file downloaded in the previous steps. Then click Upgrade.
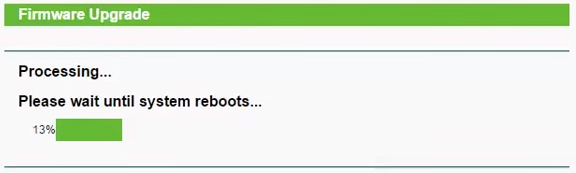
The firmware upgrade process will take about 2-3 minutes. Hang tight.
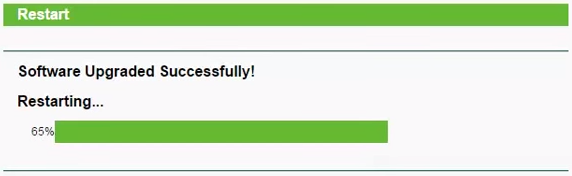
Once the upgrade is done, you should see another progress bar like this informing you that the router is restarting.
Step 4:
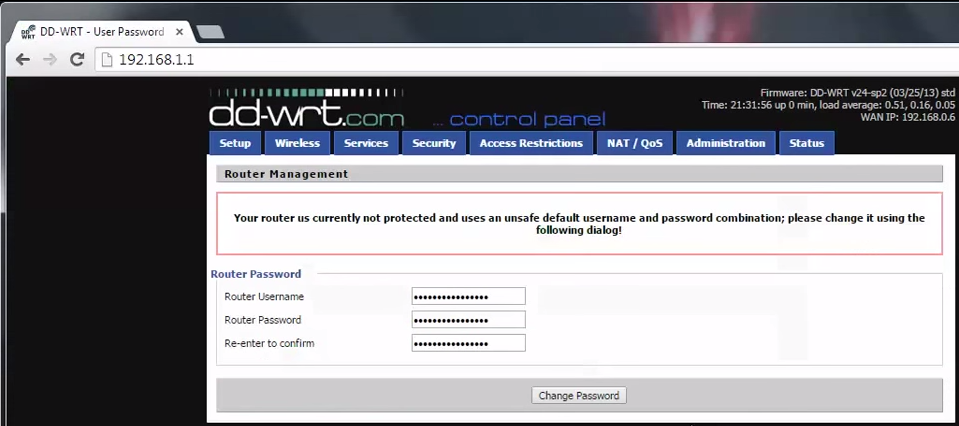
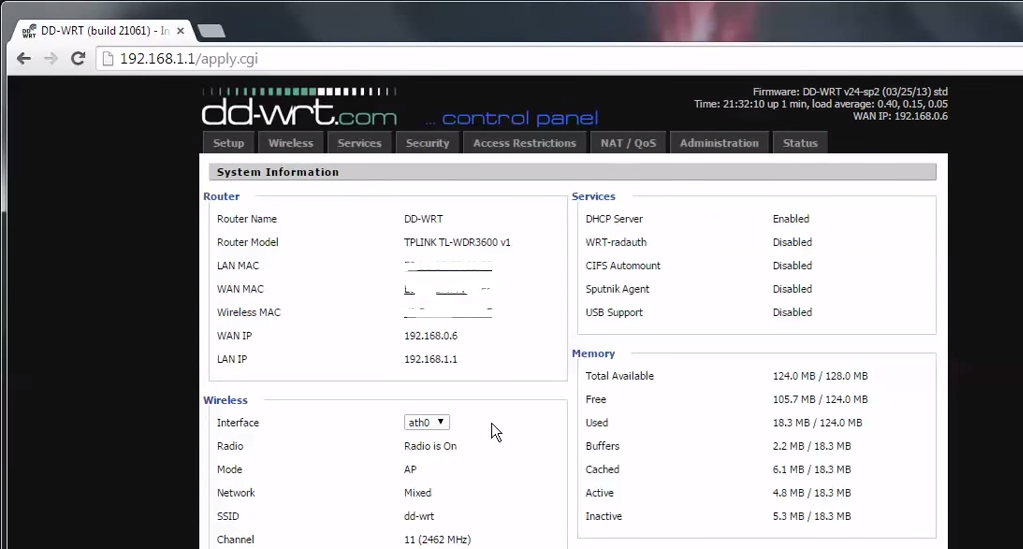
If all goes well, which it should and will, you should see the new DD-WRT router page.
One thing to note here. If your router was configured to use a different IP range, for example10.15.15.x, then you'll need to manually go to192.168.1.1to see this page. This is the new firmware's default IP range. You'll need to reconfigure it if you want to work on a different range.
On this page, enter a username and password and click Change Password.
Now you will be inside the router configuration page.
Your router just gained a whole lot of features that are available only in high end ones. For free. And in less than 10 minutes. That isn’t so bad, is it? Have fun configuring!
Now that you’ve got DD-WRT powered up, see how you can configure DD-WRT to access computers using hostnames on your home network
(header image source: freeimageslive.co.uk)


Leave a Comment