
Convert a physical machine to a virtual machine (P2V) using VMware vCenter Converter Standalone – A Step-by-Step Guide
In this guide, I will walk you through a step-by-step procedure to convert my physical, bare-metal Windows Server 2003 to a virtual machine. We will be doing a remote hot cloning, i.e., virtualizing a powered on physical machine.
I’ll also show you some errors that I ran into during this process and how I fixed them.
Why P2V?
P2V means “Physical to Virtual”. This conversion copies over the operating system, applications and data from an existing physical server a new virtual server.
Virtualization allows you to dramatically reduce your server room requirements by phasing out legacy hardware. Virtual machines are hardware agnostic and make a sysadmin’s life easier. They make backups & disaster recovery easier & more reliable. In case of any hardware failure, you can quickly get the VM up and running on a different piece of hardware with zero or negligible downtime. Also, reduced power consumption, less datacentre space, less hardware to maintain and repair – all reduce costs.
So, let’s get started.
What you need:
- A physical machine that you want to convert to virtual (P2V conversion).
- I have a physical (bare-metal) Windows Server 2003 that I want to virtualize.
- VMware virtual infrastructure
- I have a VMware vSphere Hypervisor (ESXi 6.0) installed on a machine. It's free of cost. You can download it for free from here: https://my.vmware.com/web/vmware/evalcenter?p=free-esxi6 (You will need to register for a free VMware account first)
- At the time of writing this article, the latest version of VMware vSphere Hypervisor (ESXi) is 6.0
- VMware vCenter Converter Standalone
- VMware vCenter Converter Standalone is a free product to convert virtual and physical machines to VMware virtual machines. You can download it for free here: https://my.vmware.com/web/vmware/info/slug/infrastructure_operations_management/vmware_vcenter_converter_standalone/6_0
- At the time of writing this article, the latest version of VMware vCenter Converter Standalone is 6.0
Additional resources (optional):
Download VMware's official user's guide for VMware vCenter Converter Standalone here: VMware vCenter Converter Standalone User's Guide.pdf Mirror: VMware official
Some points to keep in mind
- P2V has a downtime of a few minutes at best. So do inform your users before making the switch.
- You should use synchronization (all this is explained in detail during Step 9).
- Important services must be stopped before synchronizing.
- Synchronization will take place at the end of your conversion process.
- Use scheduled synchronization.
- Make sure you do not select Perform final synchronization at Step 9.
- Your downtime should be roughly the duration of the synchronization.
Step 1:
Download VMware vCenter Converter Standalone from here: https://my.vmware.com/web/vmware/info/slug/infrastructure_operations_management/vmware_vcenter_converter_standalone/6_0
Install this on any workstation which is connected to your network. It doesn’t necessarily need to be installed on the machine you are migrating. The converter can be installed on any PC connected to the network.
Once installed, launch it.
Step 2:
Select Convert machine

Step 3:
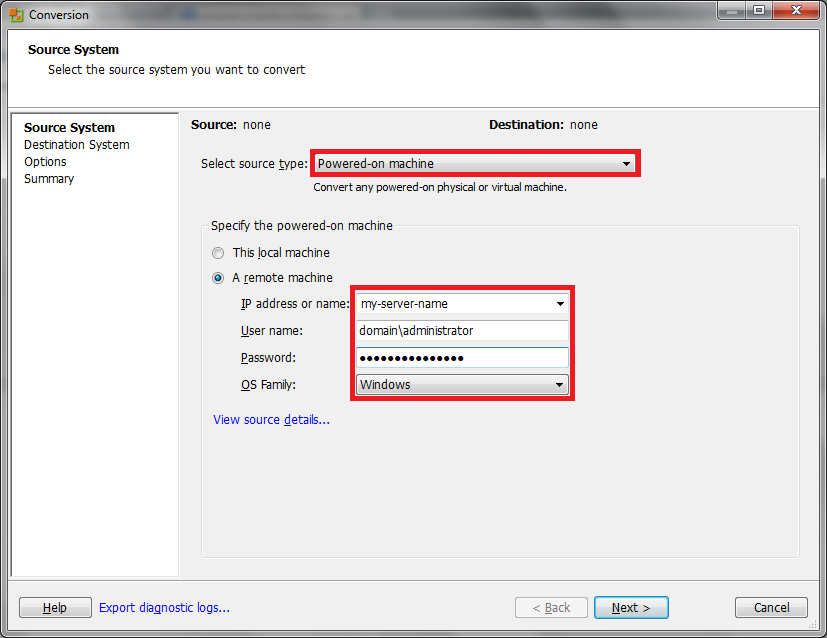
In our scenario, we will be migrating a powered-on physical machine (hot cloning), so select Powered-on machine from the Select source type dropdown.
Since the VMWare vCenter Converter Standalone is installed on a different machine than the one we are migrating, select A remote machine. As shown below, enter the IP address or name for your physical server. Enter the User name & Password to connect to this physical server.
Username is in the form of domain\username (You can even use username@domain). Use an account which has full administrator privileges on the remote machine.
Since our physical machine is Windows Server 2003, select OS Family as Windows from the dropdown. Click Next
Step 4:
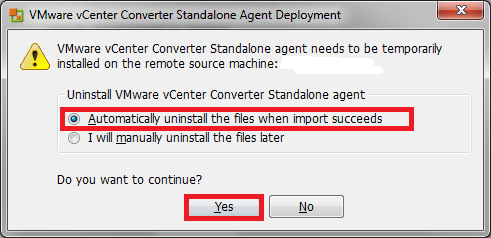
VMware vCenter Converter Standalone will need to install an agent in your physical server temporarily. It will do so automatically. Once the migration is successful, you can specify to automatically remove this agent.
In the dialog box that pops up, select Automatically uninstall the files when import suceeds.
Click Yes.
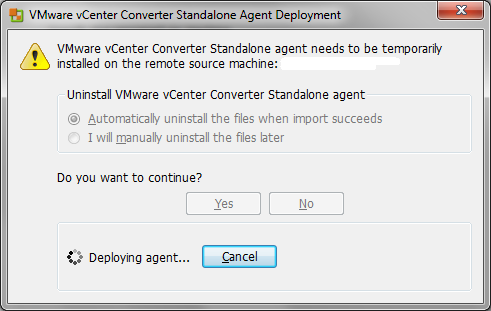
Wait for it to deploy the agent.
Step 5:
If you do not get an error, you can skip to Step 6.
At this point, you may or may get an error. It can be something like:
Error 1219: Multiple connections to a server or shared resource by the same user, using more than one user name, are not allowed. [...]
Or, you might also get an error like this:
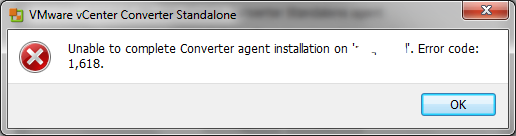
It is an easy fix.
- Disconnect all network drives to this server from your current PC.
- Open My Computer / This PC and check for any mapped network drives to this server. If you find any, disconnect them.
- Log in to the physical server and disconnect any remote drives. (Run the command below in a command prompt window)
net use \\<remote_hostname> * /delete
- Close any applications that are connected to this server.
- Close all Windows Explorer windows showing files from this server
- Close all Microsoft Management Console (MMC) snap-ins in the server you are trying to convert.
Once you do the above, carry out steps 2 to 5 once again. If you still get an error, reboot your PC (the one that has the VMware vCenter Converter Standalone installed).
More information on this error and similar errors here: https://kb.vmware.com/selfservice/microsites/search.do?language=en_US&cmd=displayKC&externalId=1001344
Step 6:
VMware vCenter Converter Standalone has now successfully connected to your physical server. Next step is to communicate with your VMware set up.
I have a VMware vSphere Hypervisor (ESXi 6.0) server set up. I want to convert my physical server to a VM running on this ESXi host.
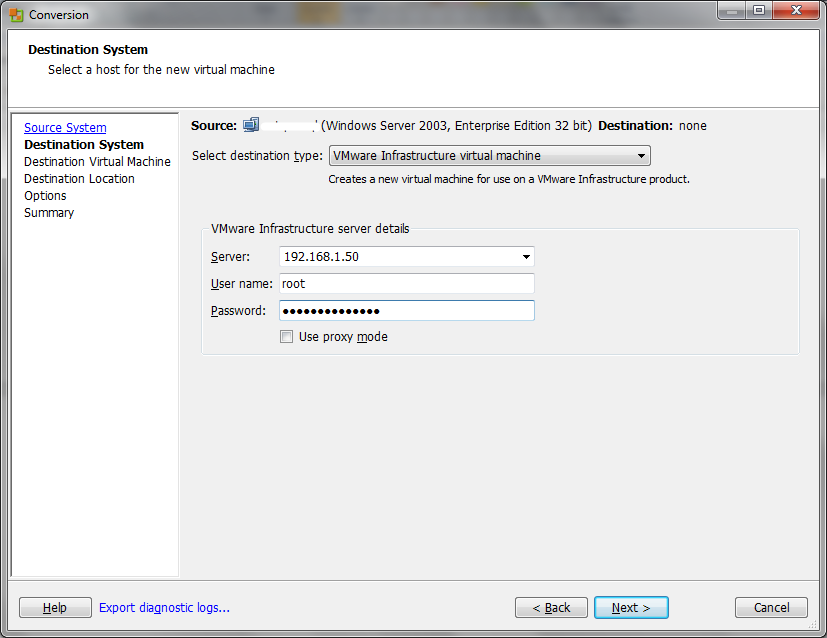
So, choose VMware Infrastructure virtual machine from the Select destination type dropdown list. (ESXi is a VMware Infrastructure, i.e., a VMware environment, so that’s why we select this).
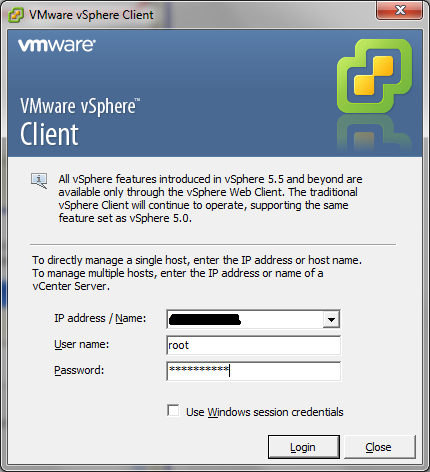
Enter your ESXi server’s IP address under Server. Type the User name and Password. If you want the data traffic to pass through your PC (where the VMware Converter is installed), select the Use proxy mode check box. We don’t want this so, leave the Use proxy mode button unchecked. Click Next.
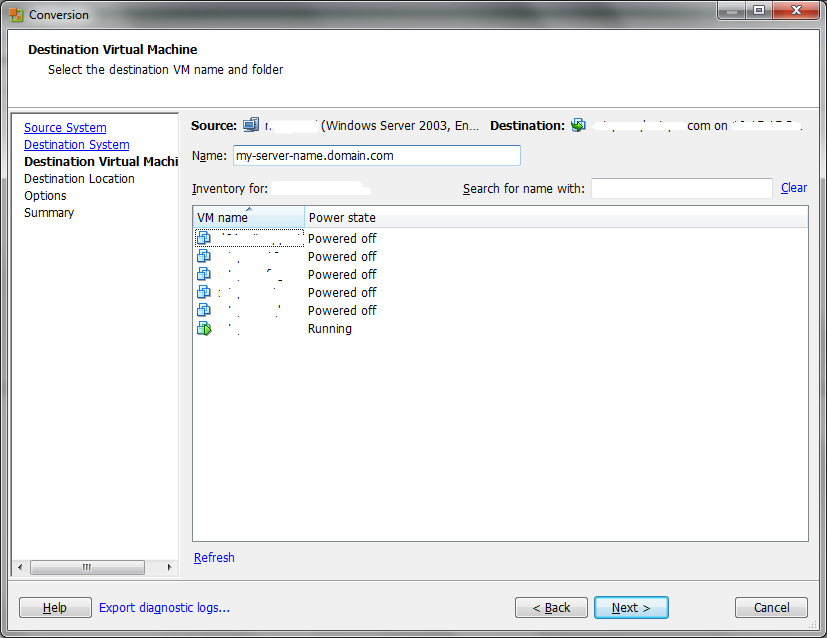
Step 7:
It has now connected to your ESXi server. Enter the Name for your new virtual machine and click Next.
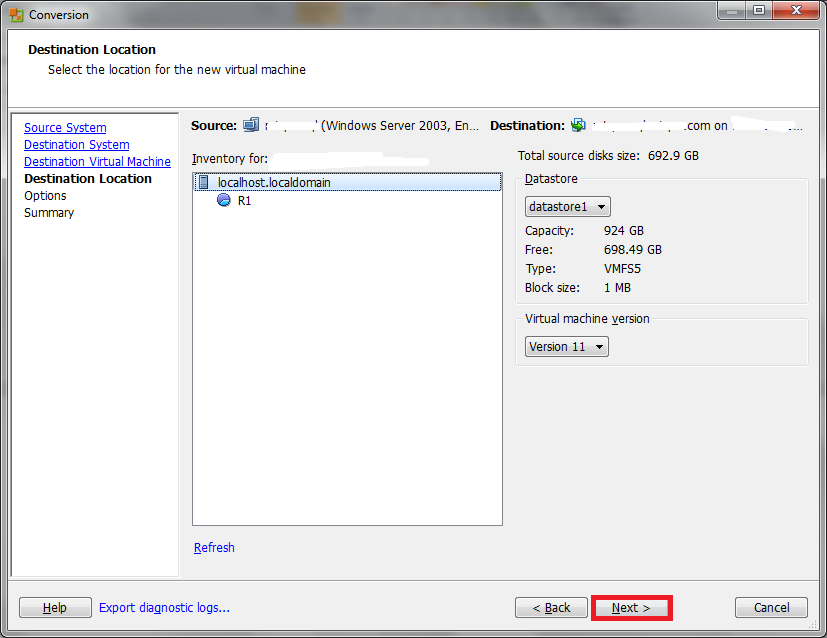
Step 8:
On the Destination Location page, choose the location for your new VM. In my case, I have only one datastore so I chose that. You can also specify the Virtual machine version. I have selected the latest available at thetime of writing this article (version 11). Note that selecting the highest version isn’t always the best. Pick a version keeping in mind your existing environment and compatibility requirements. Since this is a test lab, I’ve picked the highest possible version.
Step 9:
This is where you’ll specify the Options for your new VM.
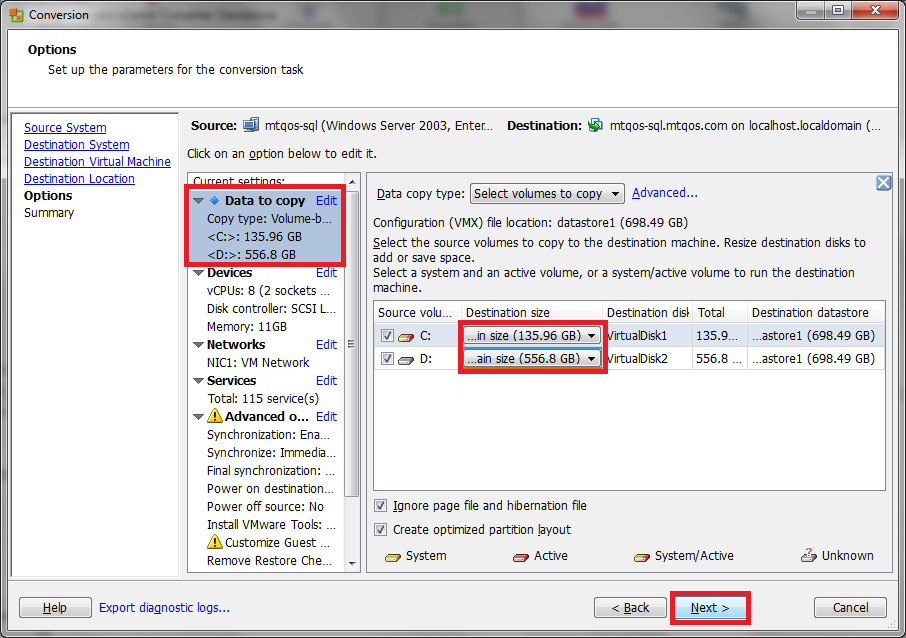
You can change settings for the new drives, CPUs RAM, etc. In this case, I’ve left everything as default except disk sizes and synchronization options.
Important note: If you change the drive sizes (as I've done below to illustrate), you will not be able to enable Synchronization. So, do not change the drive sizes. Leave them as default.
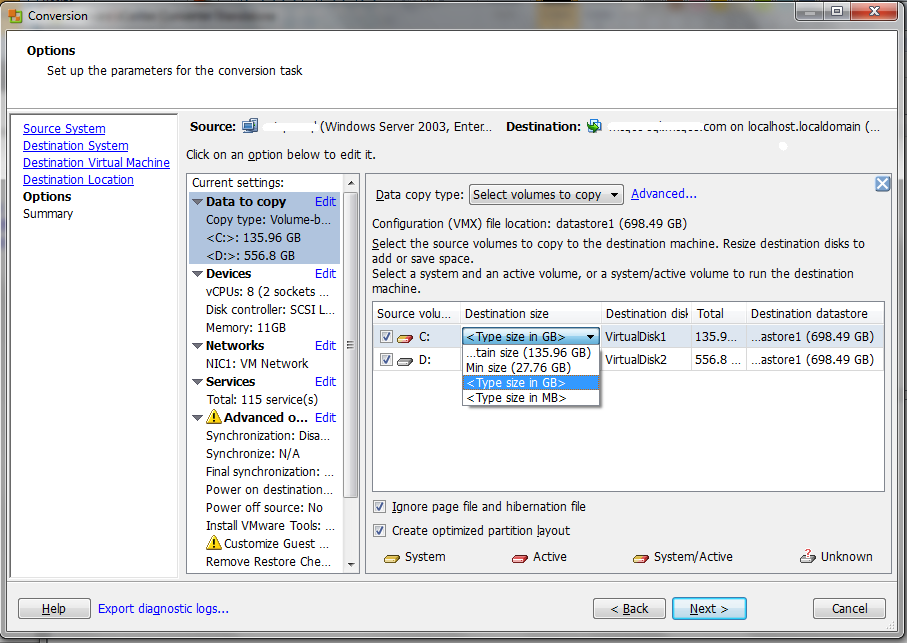
As you can see above, I’ve changed the default sizes of C: and D: drive.
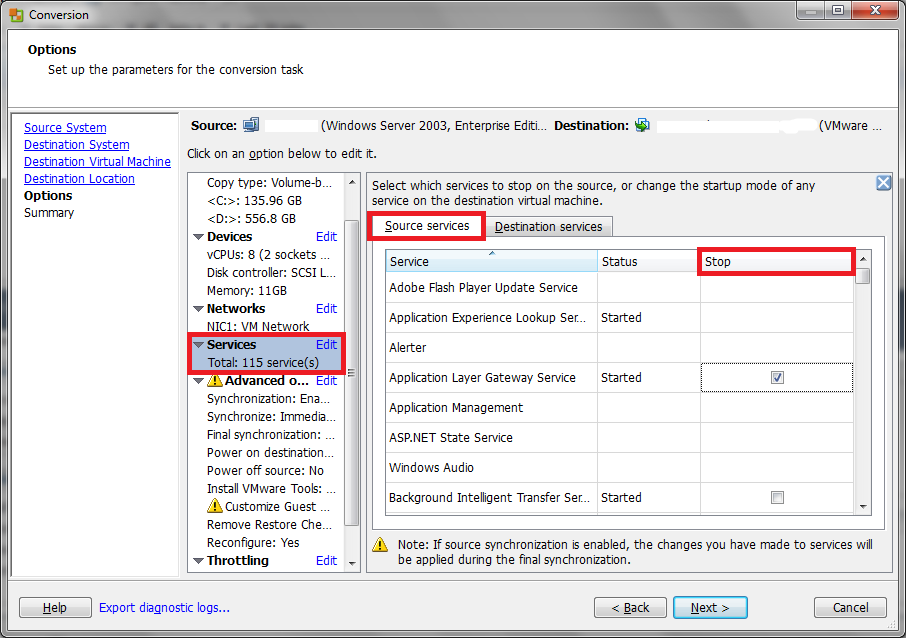
Stop services running on the source machine.
You can make sure that you do not lose data from services running on the source machine. You can select the services that you want to stop before Converter Standalone synchronizes the data between the source and destination machine. As a result, the services do not generate data while source and destination machines are synchronized (more on synchronization after the jump).
Select Services > Source services tab. To stop a service on the source machine before synchronization, highlight a service and select the Stop check box to the right.
Next, we will specify synchronization options.
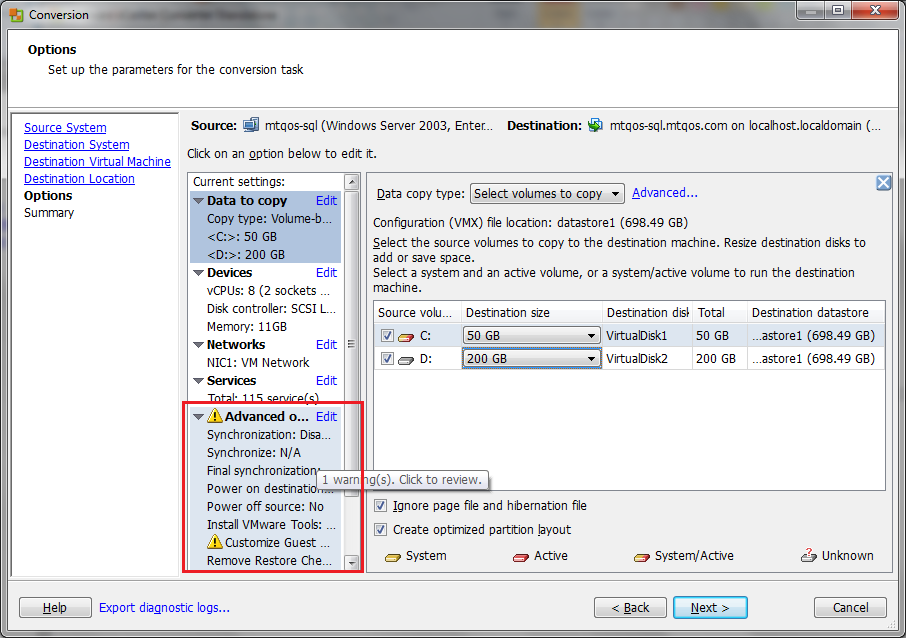
Here you can set a schedule for synchronization.
What is synchronization? When you convert a powered on Windows machine, Converter Standalone copies data from the source machine to the destination machine while the source machine is still running and generating changes. This process is the first transfer of data. You can transfer data for the second time by copying only the changes made during the first transfer of data. This process is called synchronization.
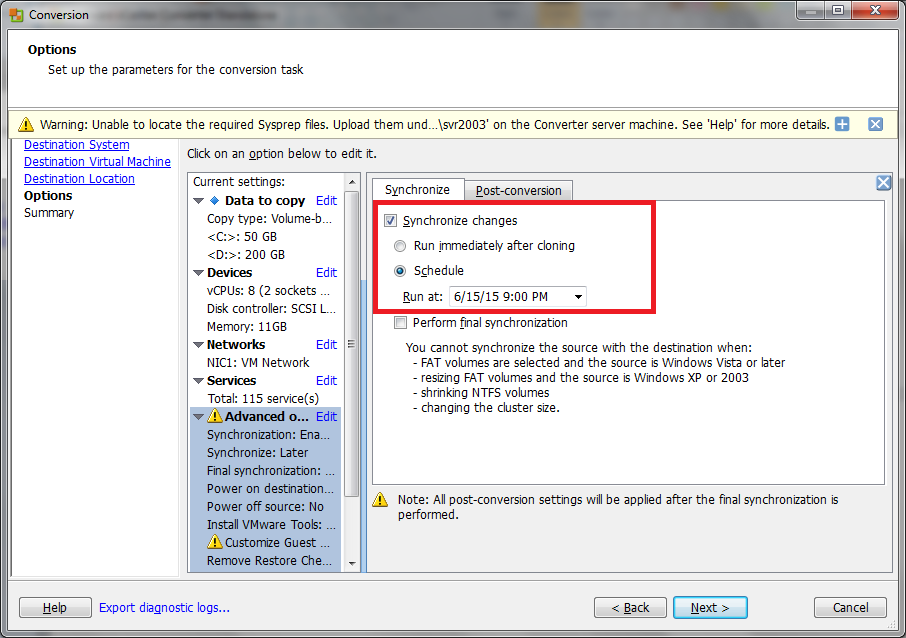
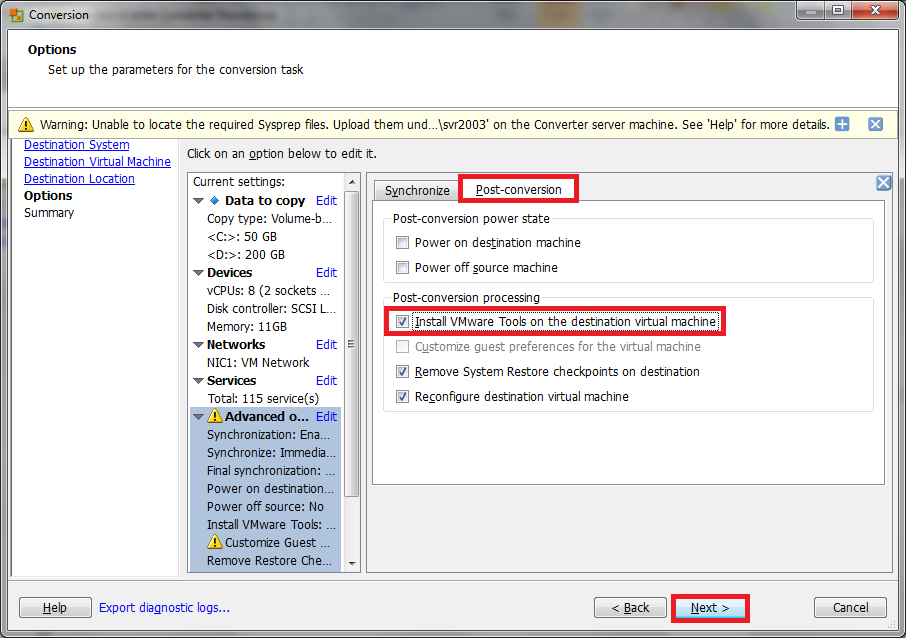
You can specify post conversion options under the Post-conversion tab. Check Install VMware Tools on the destination virtual machine and click Next
Step 10:
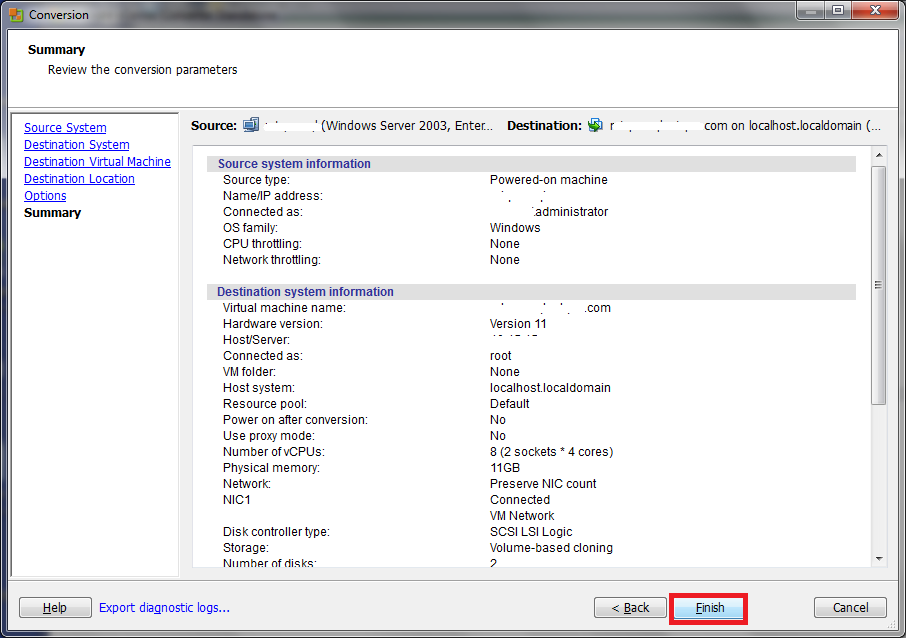
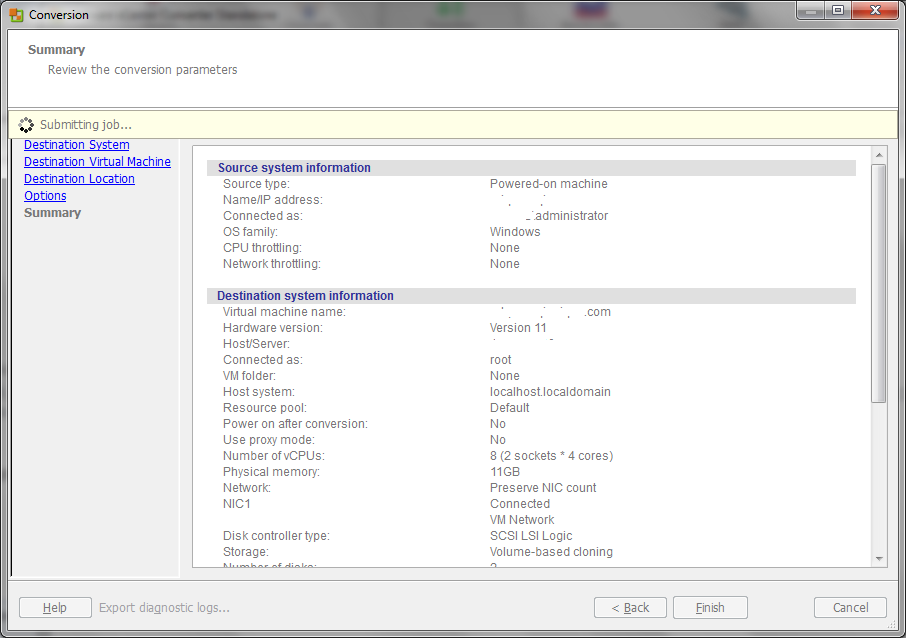
Review the summary once and make sure everything is OK. Click Finish.
Step 11:
As I had mentioned in Step 9, you will get an error if you change the drive sizes and enable synchronization at the same time.
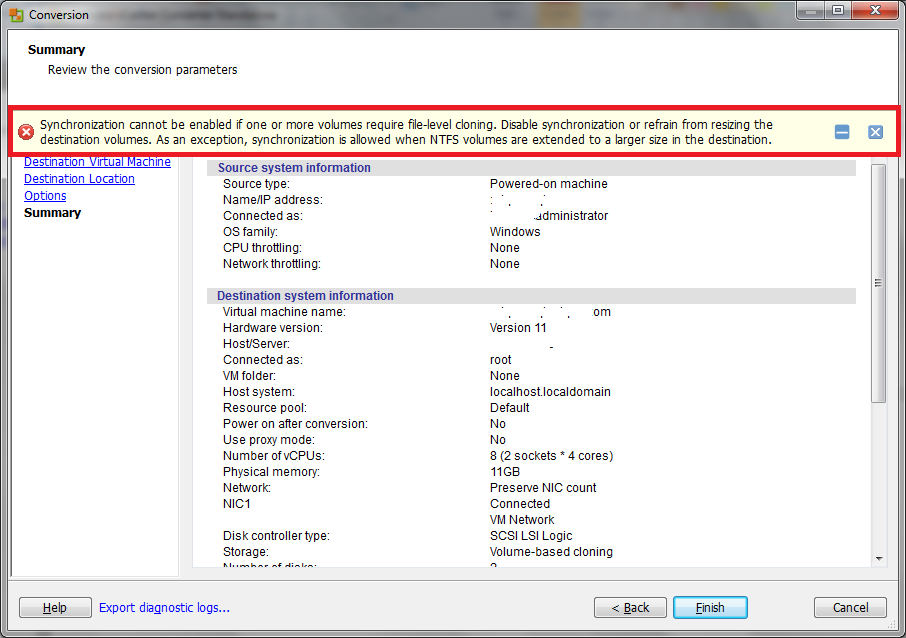
To fix this, go Back and set the drive sizes to the default and click Next.
Verify the summary and click Finish.
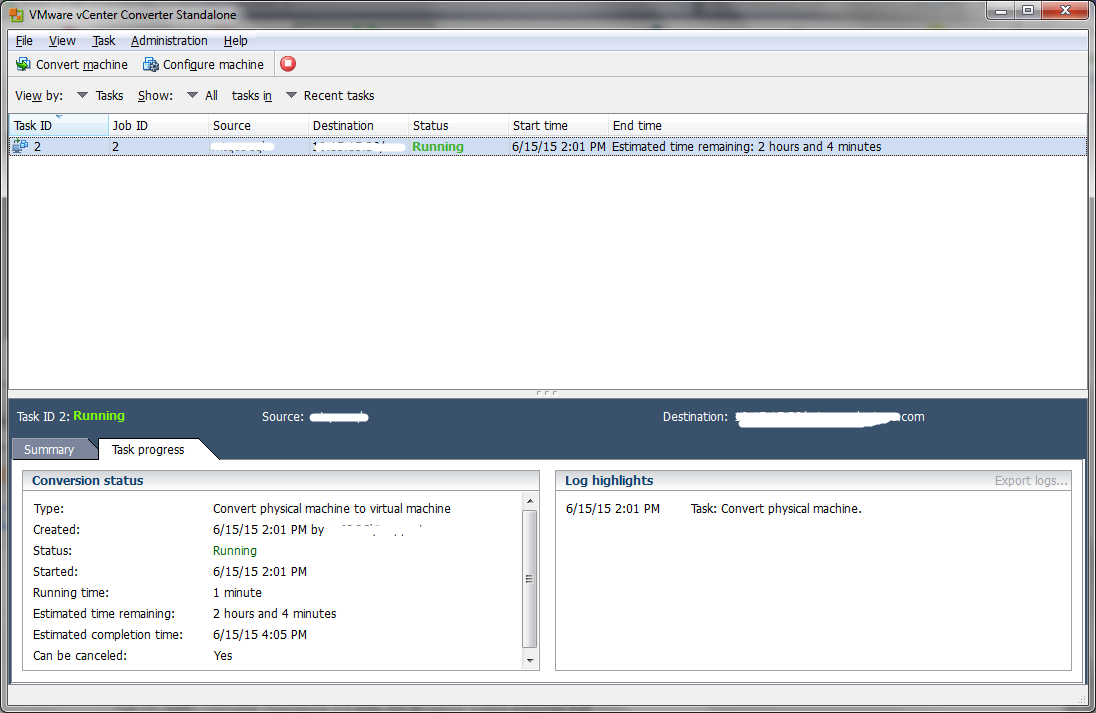
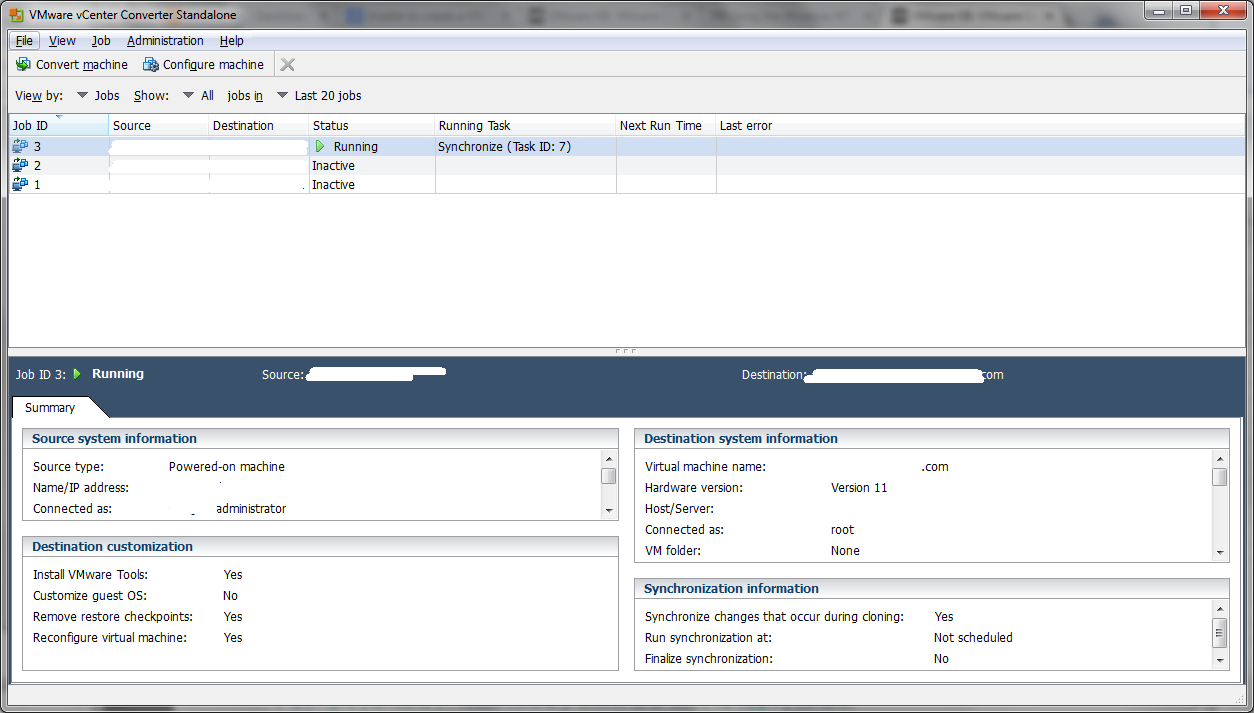
Step 12:
You will see now that the task has been submitted and is now in the Running status. This should take a couple of hours.
Step 13:
Sometimes, after the initial cloning is complete, you may get an error during Synchronization. Let us see what could be the reason for this and how it can be fixed.
If you do not get this error, you can skip to Step 17.
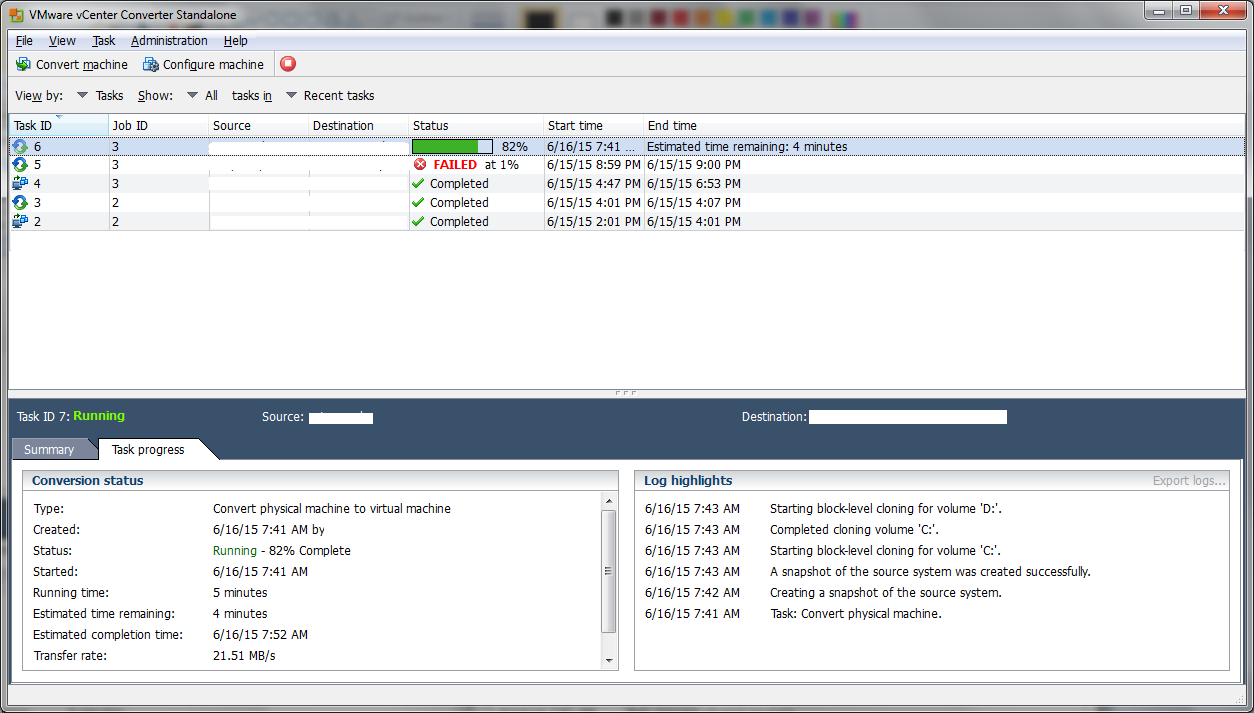
As you can see below, Synchronization has failed at 1% with the error:
FAILED: Unable to create a VSS snapshot of the source volume(s). Error code: 2147754774 (0x80042316)

If you select Jobs view, you can see the exact process that failed.
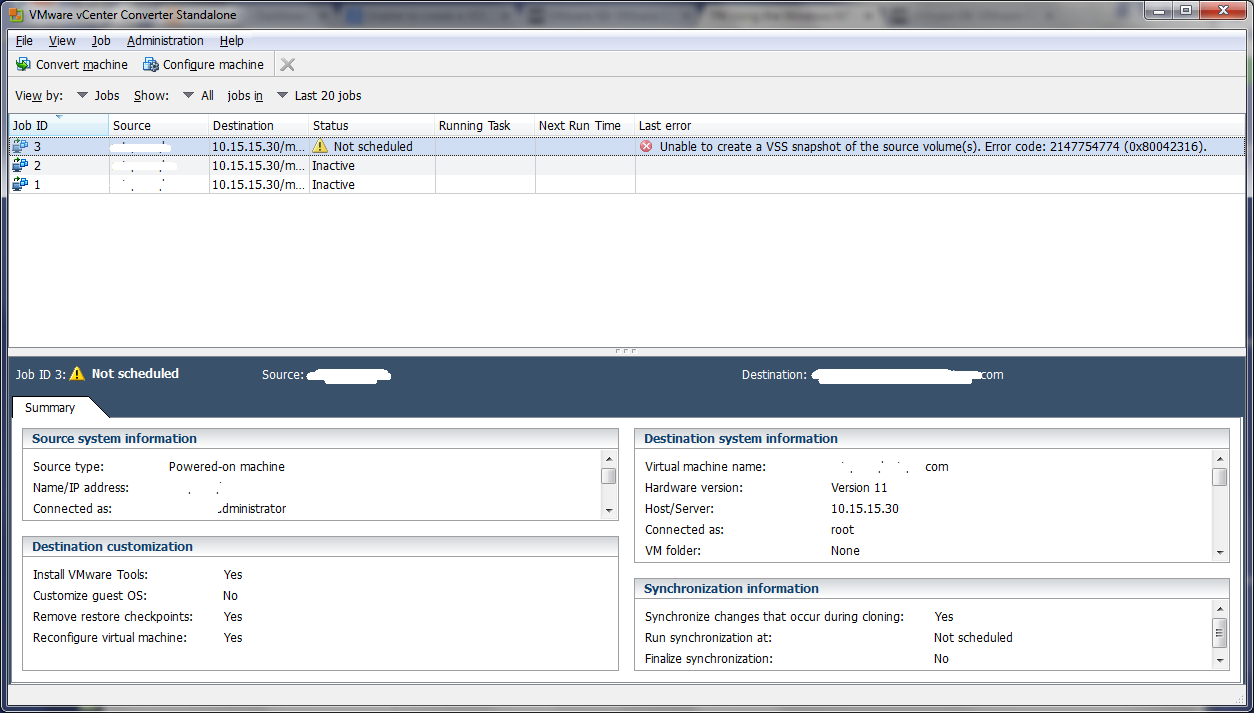
This error happens because in your physical server, if Volume Shadow Copy Service (VSS) has problems performing a snapshot of disks, which can occur if multiple providers are associated with the operating system. Steps 14, 15 & 16 will show you how to fix this.
This can happen if you're running Windows Server 2003. You can read more about it in VMware's knowledgebase article: https://kb.vmware.com/selfservice/microsites/search.do?language=en_US&cmd=displayKC&externalId=1035241 More: https://kb.vmware.com/selfservice/microsites/search.do?language=en_US&cmd=displayKC&externalId=1039087
Step 14:
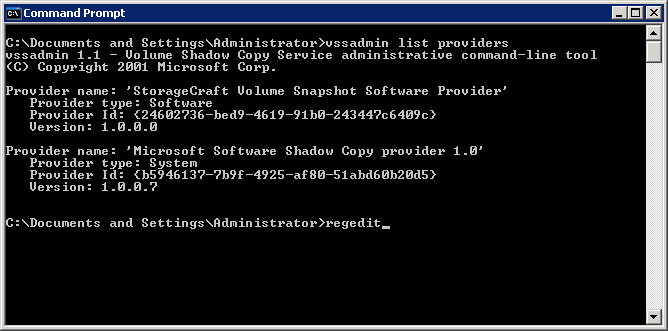
Log into your physical server. Launch cmd.exe and type vssadmin list providers and hit Enter.
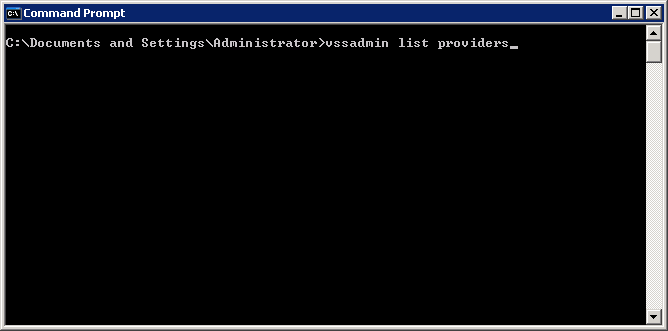

As you can see, there are two providers associated with VSS. We will have to remove one. In this case, we will keep the Microsoft provider and remove the StorageCraft one. Note that this can affect your 3rd party backup software (in this case StorageCraft ShadowProtect). After the synchronization is complete, we can add this StorageCraft provider back to VSS. This is illustrated below.
Step 15:
To remove the VSS provider, we need to edit the registry. In a cmd window, type regedit and hit Enter.
Navigate to HKEY_LOCAL_MACHINE\SYSTEM\CurrentControlSet\Services\VSS\Providers
Here you’ll see the two VSS providers.
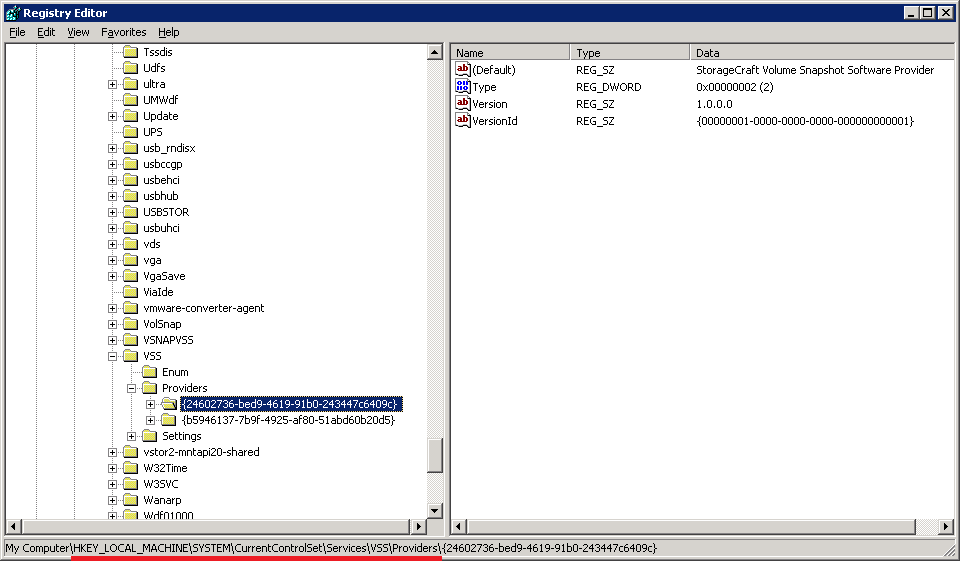
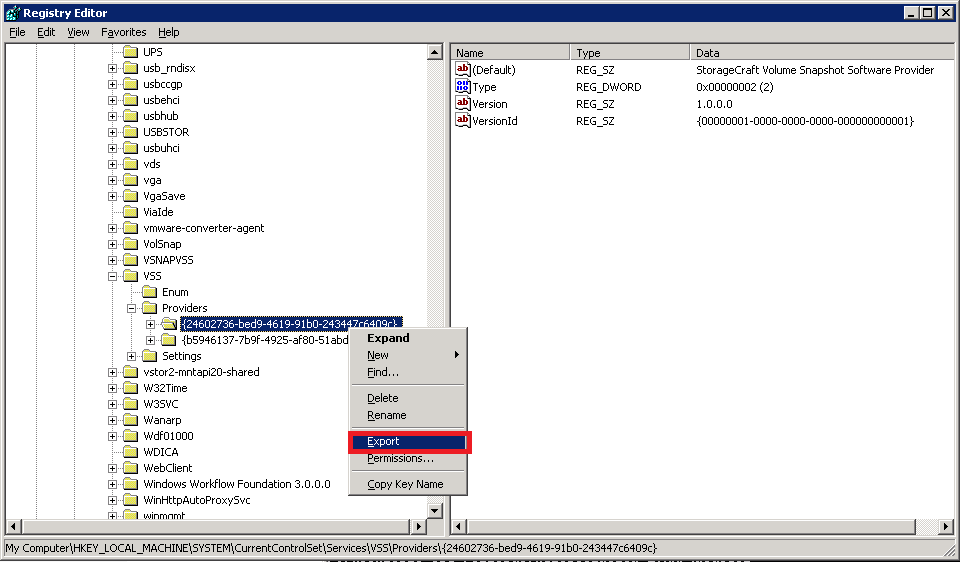
Select the non-Microsoft VSS provider and right-click it. Choose Export.
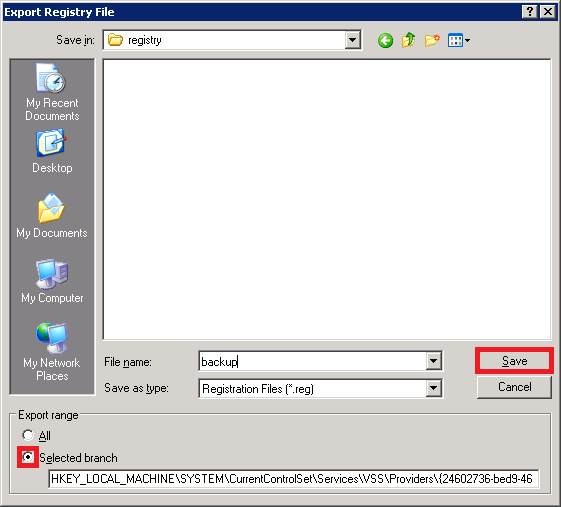
Save this registry key in a safe location. Type a filename and make sure the Selected branch radio button is elected. Click Save. Do not lose this .reg file. Later, you can restore this deleted registry entry by simply double-clicking the .reg file.
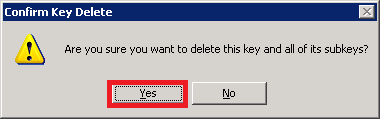
Once you’ve exported the key successfully, right-click the key again and select Delete.
Make sure you've exported the key before deleting it.
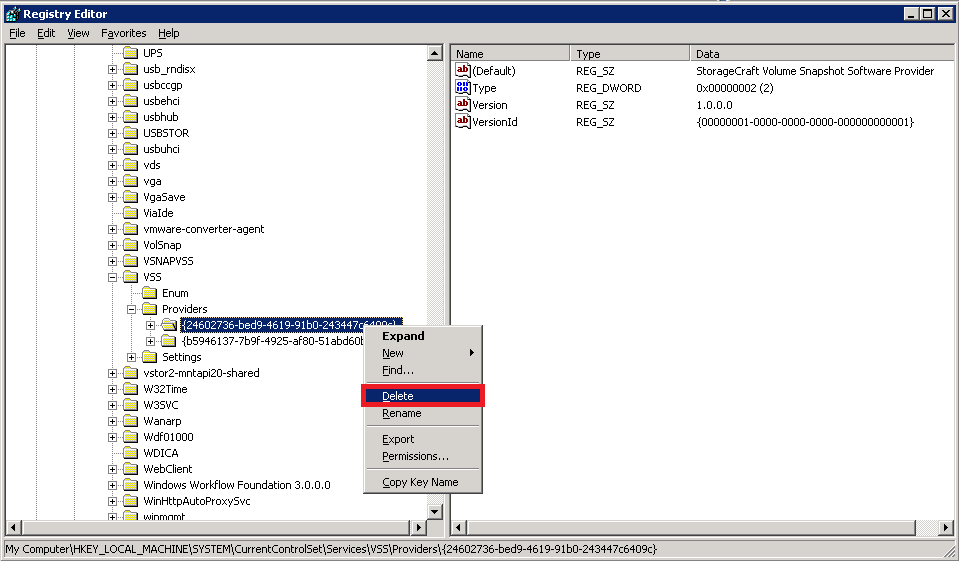
Select Yes
Once deleted, reboot this physical server.
Step 16:
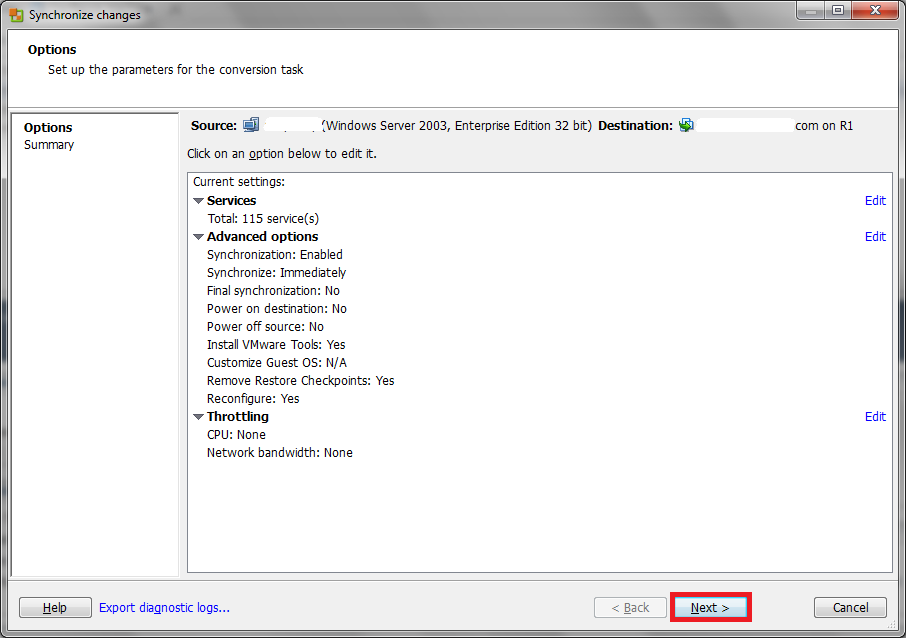
Once the physical server reboots, right-click the failed task and select Synchronize.

If you want to run it immediately or schedule it, then just change the settings under Advanced options. Otherwise, click Next.
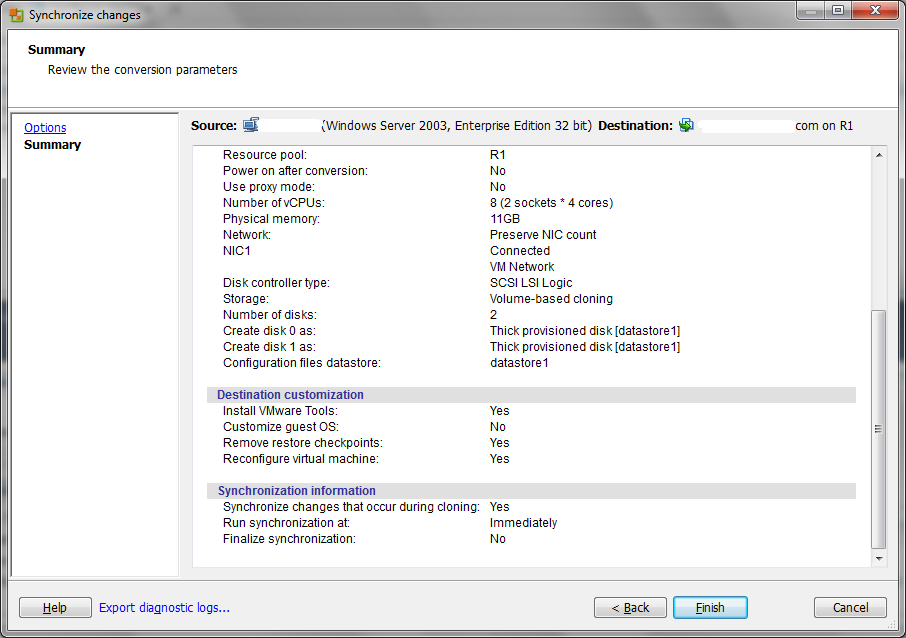
Click on Finish on the summary screen.
The synchronization job will now start running.
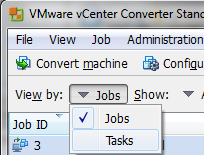
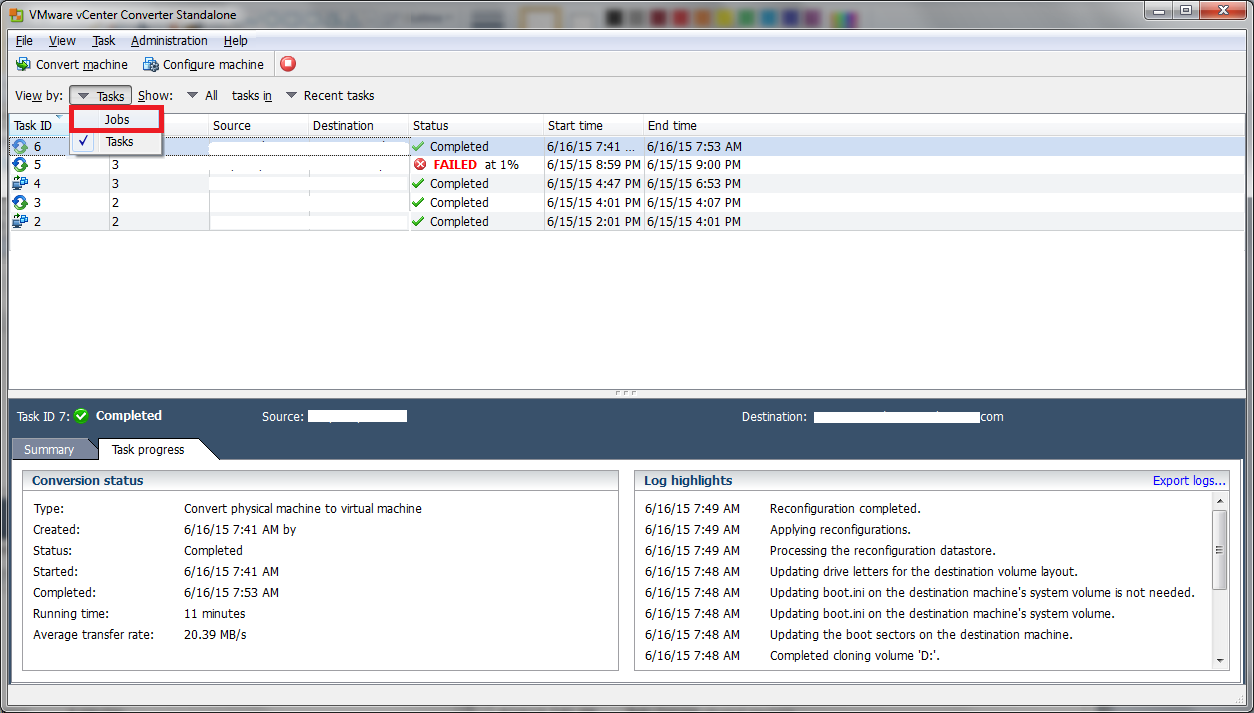
To view individual tasks, select Tasks from the View by dropdown.
Here you will be able to see the current status of your synchronization task.
Step 17:
Synchronization is now complete. Your VM should now be ready.
Step 18:
Log into your vSphere (ESXi) server.
You will see that your new VM has appeared in the list.

Step 19:
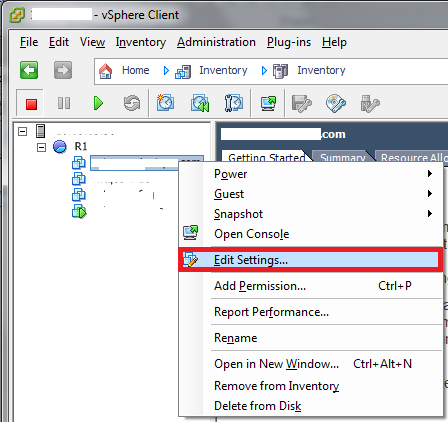
Do not start the VM yet. Right-click the VM and choose Edit Settings…
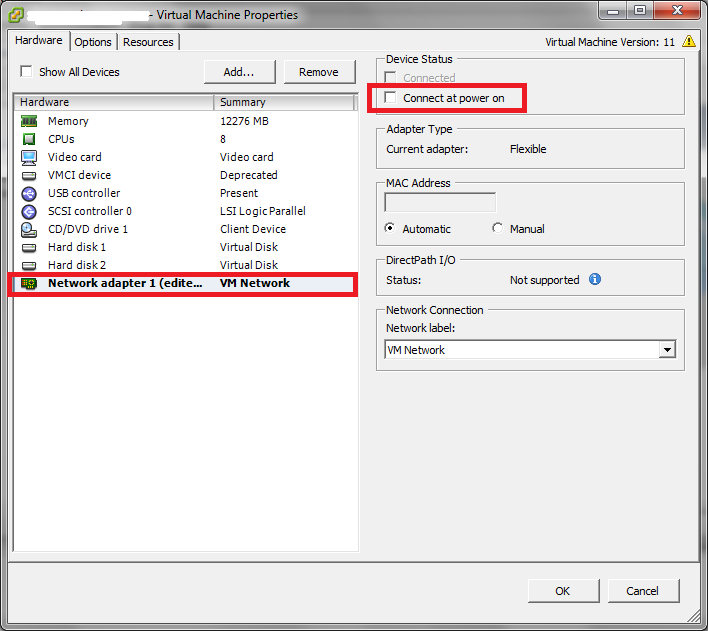
Under the Hardware tab, choose Network adapter and uncheck the Connect at power on. We do not want the VM to be connected to the network when we power it on. This will prevent any conflicts in the network & with the existing physical server.
Step 20:
Start the VM now. If all goes well, it should boot up.
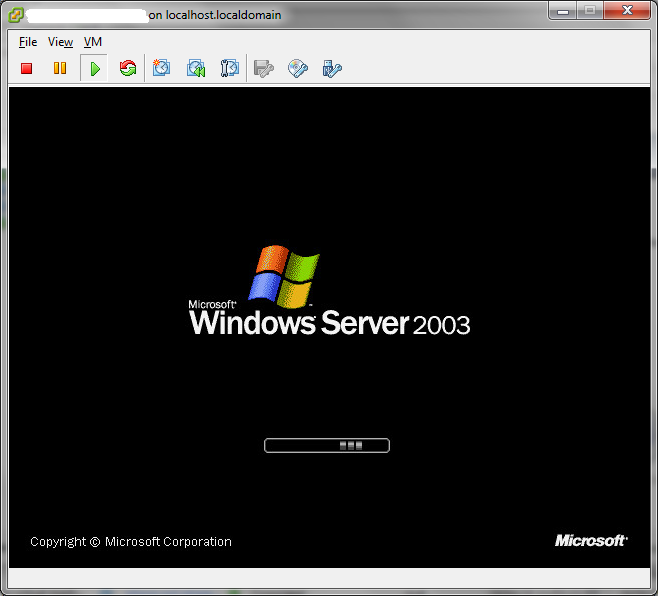
Double-check for any missing drivers and see if everything works as expected. After confirming that everything is functional, you can proceed to power down your physical server when users are not connected to it. Turn off the VM as well, go to it’s settings and connect the network adapter back (the one that was disabled in Step 19). Power on your VM.
Make sure that the physical server is off before turning on the VM with network card connected.
Change the IP address of the VM to that of the physical server.
Step 21:
If you had got an error in Step 13, do this step, otherwise skip to Step 22.
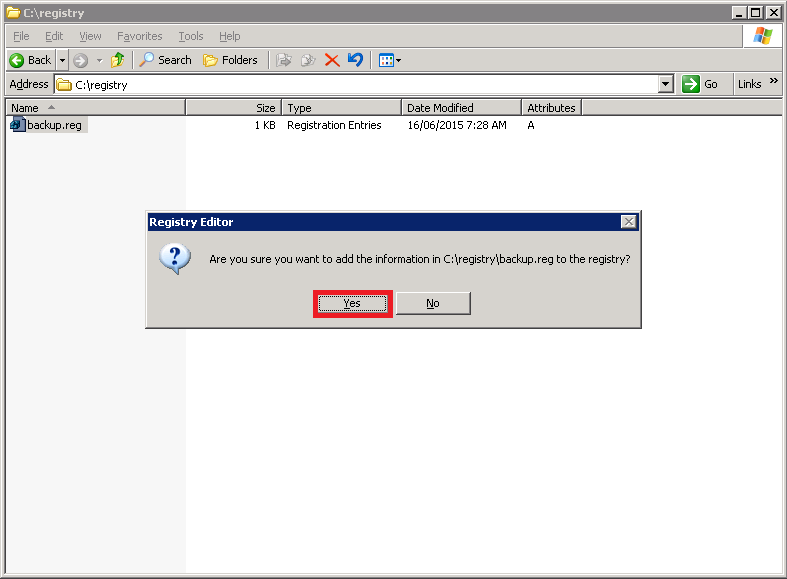
In your virtual machine, navigate to the location where you saved your exported .reg file. Double-click it and click Yes when it asks you to add information to the registry.
Step 22:
As a final step, go ahead and test all your applications. You’ve successfully migrated a physical server to a virtual machine. Good job!
(header image source: ismweb.com)


Leave a Comment