
How to set up Shrew Soft IPSec VPN Client for WatchGuard
This guide will show you how to enable Mobile VPN with IPSec for WatchGuard Firebox M300. It’s a pretty straightfoward process, however it took me quite a while to figure out initially. Hope this guide makes it easier for you.
It will also show you how to install and configure the Shrew Soft IPSec VPN Client. In my opinion, you are better off using this client than the WatchGuard IPSec Mobile VPN Monitor. Old versions of this WatchGuard IPSec Mobile VPN Monitor were free, but they do not work on Windows 10. The new version of the IPSec client needs a paid subscription license. Unless you want to go this route, I would suggest using the Shrew Soft IPSec VPN Client. It’s free and you can download it from their official website.
Note: While this guide was created for Firebox M300, it should work with other WatchGuard XTM devices as well.
What do you need:
- An environment where a WatchGuard firewall is installed and running.
- Administrative access to the firewall (of course).
So let’s being shall we?
Step 1
Fire up your browser and navigate to the web interface of your firewall? If your firewall’s IP address is 192.168.1.1, then type https://192.168.1.1:8080 in the URL bar.
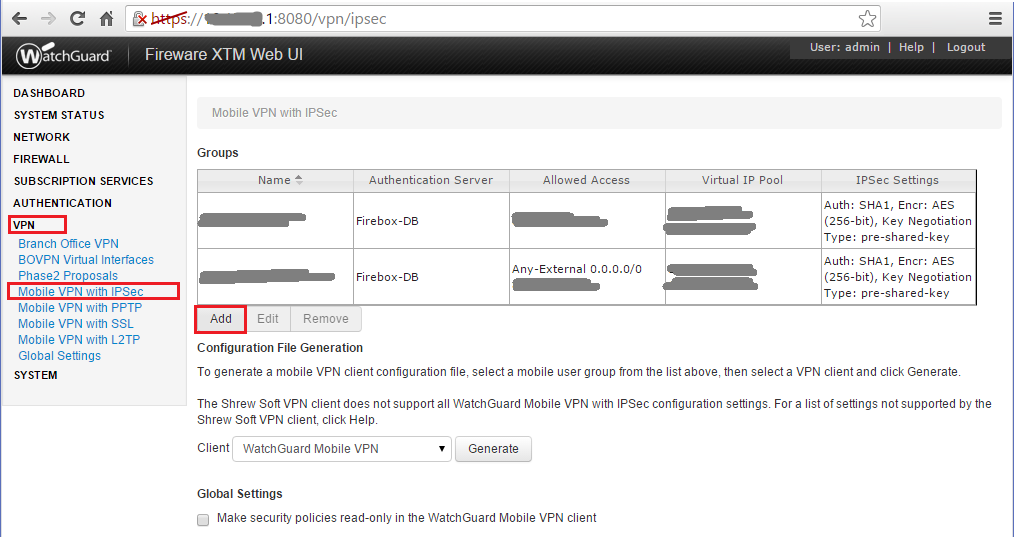
After logging in, go to VPN > Mobile VPN with IPSec.
Click on Add to add a new group.
Step 2:
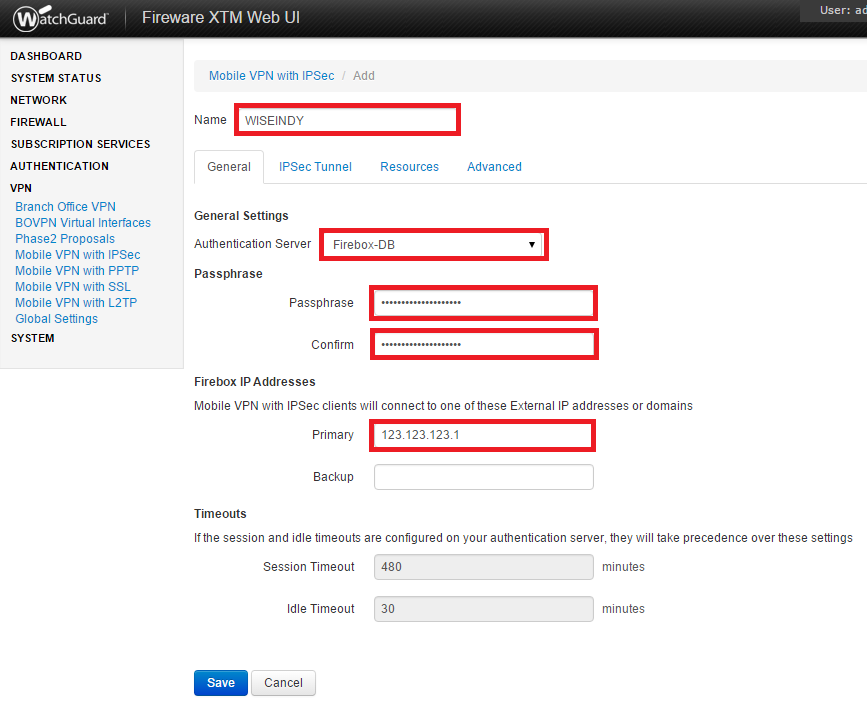
Select the General tab. Type in a Name and select Authentication Server as Firebox-DB. You can also set it to authenticate it with your domain, but for this tutorial we will use the firewall as the authentication server.
Next, enter the passphrase and enter your firewall’s external IP address. This is the IP address that you use to connect to your firewall from the Internet.
Step 3:
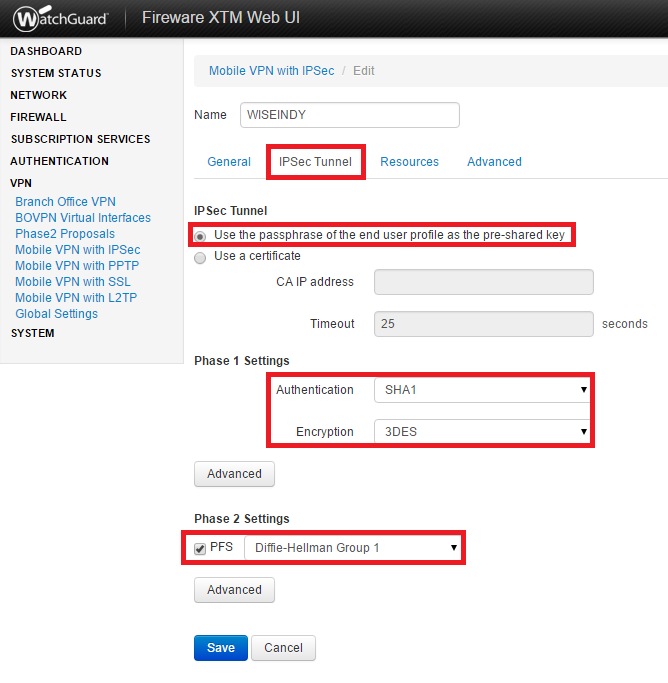
Select the IPSec Tunnel tab. Make the following changes as shown in the image below.
- Select Use the passphrase of the end user profile as the pre-shared key.
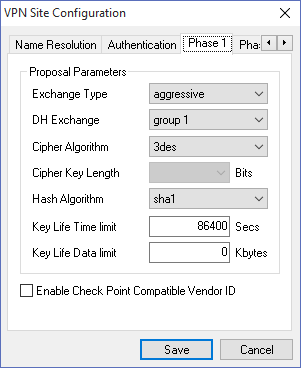
- Under Phase 1 Settings, select Authentication as SHA1 and Encryption as 3DES.
- Under Phase 2 Settings, seelct PFS and choose Diffie-Hellman Group 1.
Step 4:
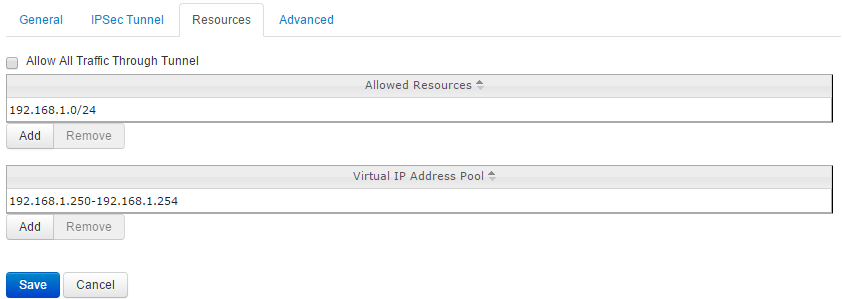
Select the Resources tab. Here under Allowed Resources you can specify which IP addresses are allowed to connect through the tunnel. Click Add and type in an IP range.
Next, you’ll have to specify the Virtual IP Address Pool. Whenever a device connects to your tunnel, it will be assigned an IP address from this pool.
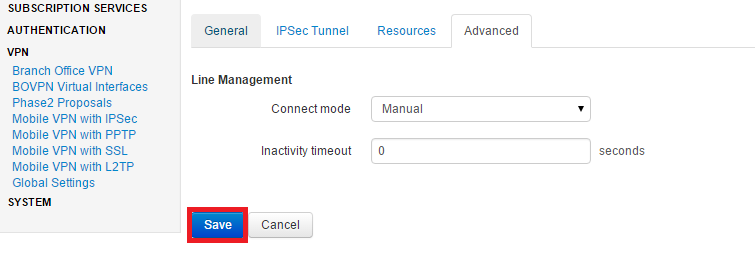
Step 5:
Finally, go the Advanced tab and set the Connect mode to Manual and Inactivity timeout to 0 seconds.
Click Save.
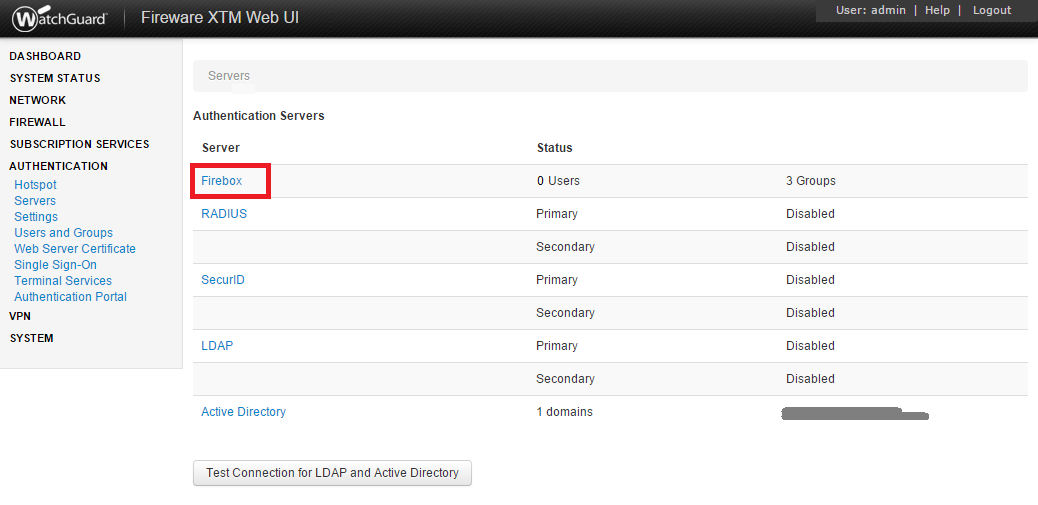
Step 6:
The next step is to create a user which will connect to the tunnel.
In your firewall web interface, navigate to Authentication > Servers.
Select Firebox.
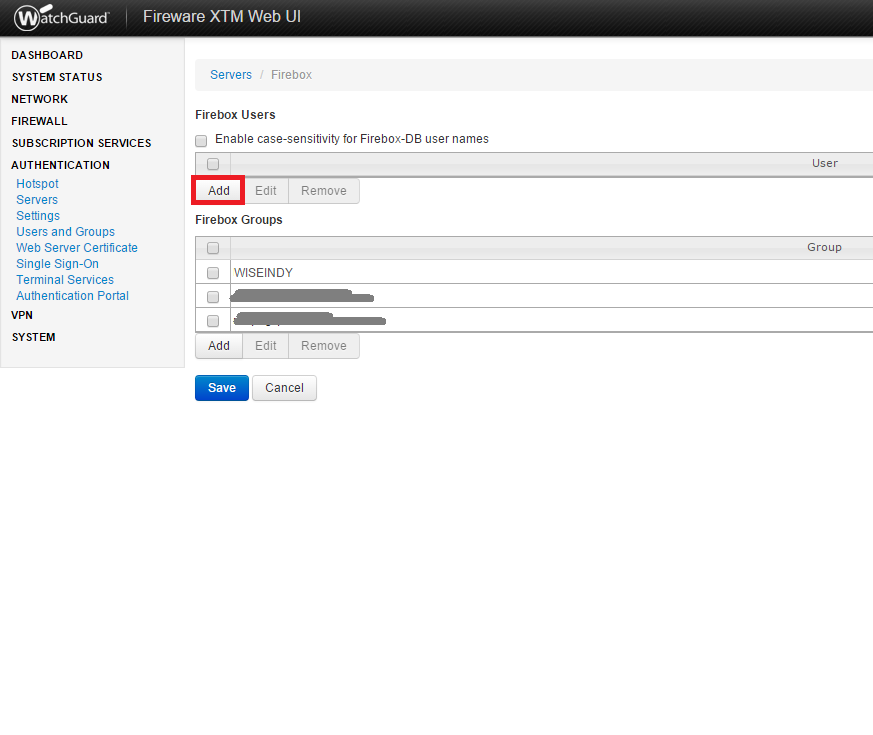
Step 7:
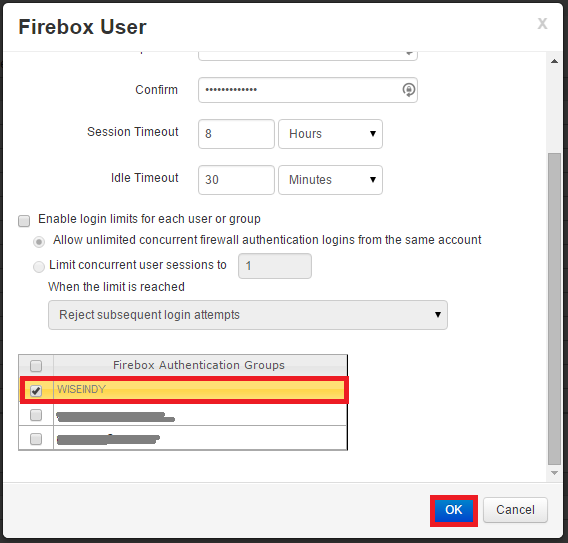
Under Firebox Users, click Add to create a new user.
Step 8:
This part is pretty straight forward. Enter the Name, Description, Passphrase and timeout values.
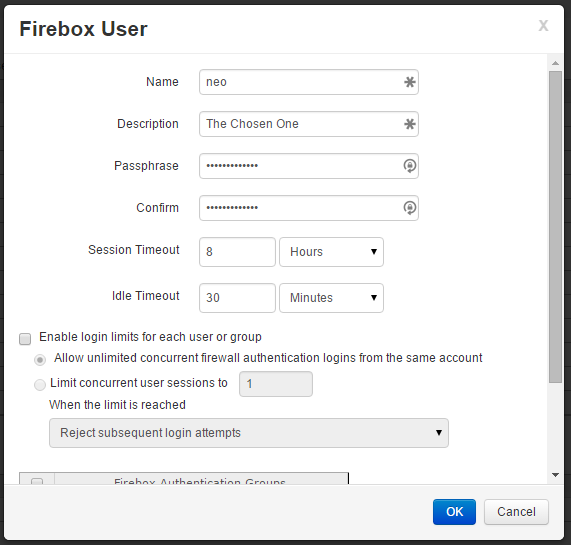
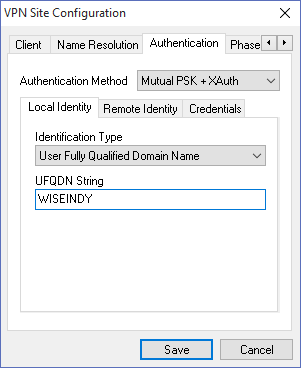
Under Firebox Authentication Groups, select the Group we created previously. In our case, it was WISEINDY, so we check that one.
Click OK.
Step 9:
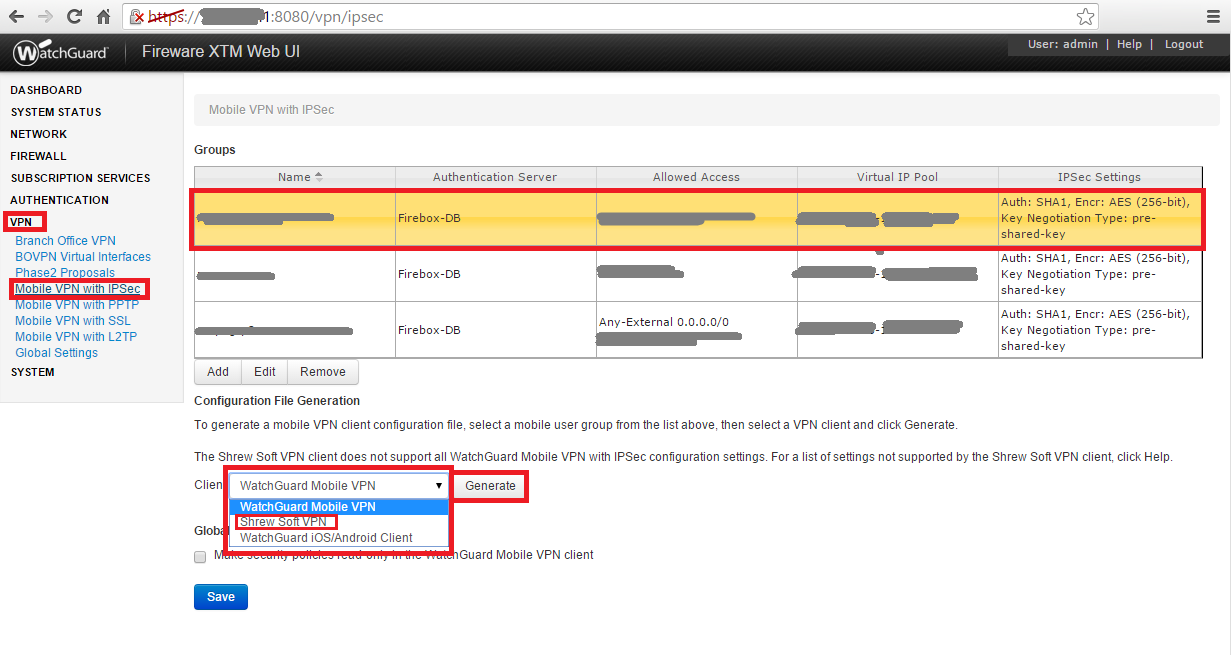
Now, navigate back to VPN > Mobile VPN with IPSec in the firewall web interface.
Here you can download the configuration settings for your preferred IPSec VPN Client. I prefer the free Shrew Soft IPSec VPN Client (click to download the client).
From the Client dropdown box, select Shrew Soft VPN and click Generate. It will generate a .vpn file. Save this on your PC.
Step 10:
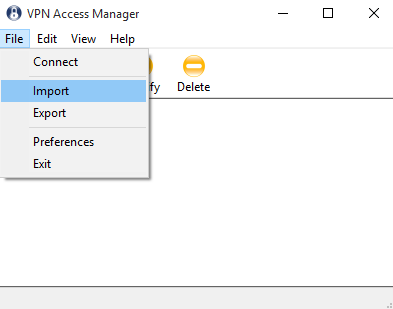
Go ahead and install the Shrew Soft VPN Client on your PC. Once installed, double click the VPN Access Manager icon on your desktop to launch it.
Select File > Import.
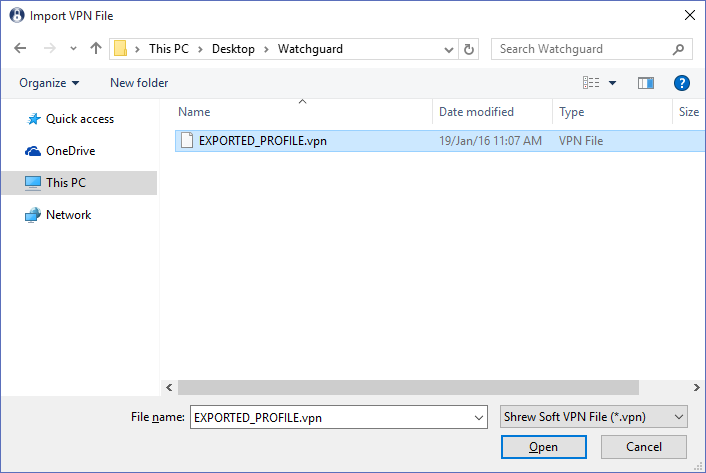
Choose the .vpn file that was downloaded in the previous step. Click Open.
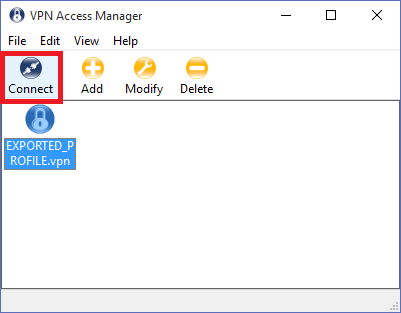
Step 11:
A new connection will be created from the imported settings. Select this connection and click Connect.
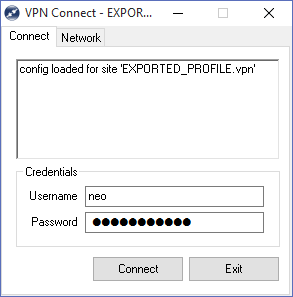
When you click Connect, a window will pop up asking you to input credentials to connect to the tunnel.
Enter the Username and Password that you used to create a user in Step 8.
Click Connect.
If the connection is successful, you’ll see a tunnel enabled message in the window.
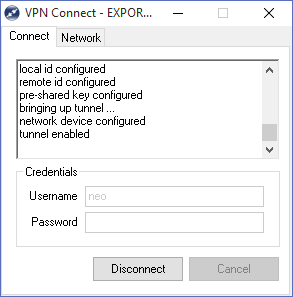
That’s all. You have sucessfully set up and configured IPSec VPN for your WatchGuard XTM device.
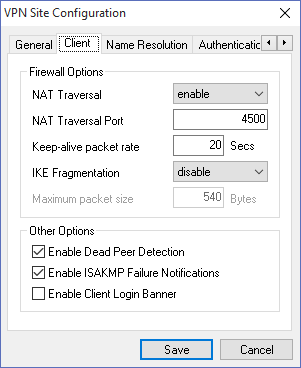
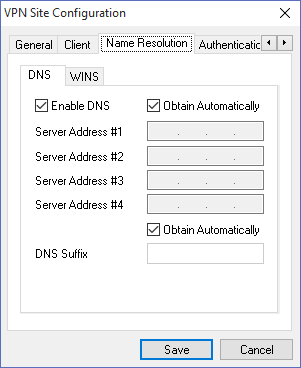
Additional information:
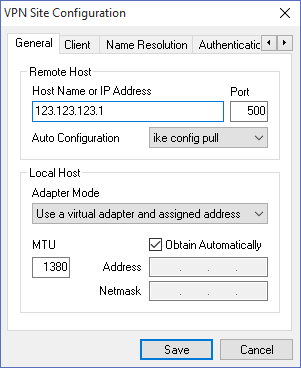
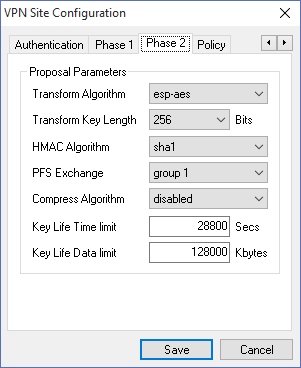
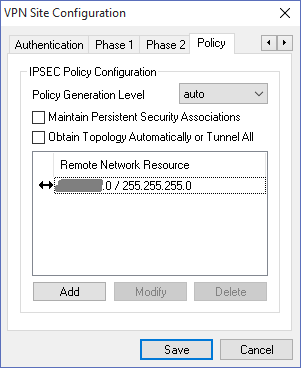
In case someone needs it, here are my configuration settings that were imported into the Shrew Soft VPN client. You don’t need to change anything here. The correct settings should automatically be configured when this file was generated by your firewall. I’ve only put up this screenshots in case someone is facing any issues and would like to double-check or compare his settings.
(header image source: sciencenews.org)


Leave a Comment